![[AKAIRI].zumu](http://2.bp.blogspot.com/-jojzkPxiFRo/Tq_AqFwAp8I/AAAAAAAAAQ4/pkr92PnQVbQ/s1600/gc1_%25E5%2589%25AF%25E6%259C%25AC2.jpg)

Paper Cards Process Log #1
So I started making these kind of paper cards around May 2014, and for the next six months I made quite a fair bit of them XDD (i always get carried away....) I made them with the intention of giving it to someone else, so I keep none of them and that's fine with me, I do hope the ppl who received them would like it!
This was my first paper dress card ever:
I made it for a classmate who (i wasn't close to her at all but you know, the teacher tasked me to do and THEN I ALWAYS GO OVERBOARD....) but I'm happy it made me realise I love doing this kind of

- Draw the design on white drawing block, then cut out the silhouette. This will be your base and if you're going to write messages on the back do it now.
- Trace and cut the parts on the respective patterned paper you wish to use. Pay attention to the patterns that would be cut!! Also, I would separate parts of the clothing according to how they would be sewn IRL (if you know how clothing works, you'll get what I'm talking about. But if you don't, uhh just look at your flattened clothes and identify the different pieces of cloth that were sewn together)
- Glue the patterned paper onto the drawing block base, also please take note of the order that you would be gluing the pieces in, for example, I will always glue the sleeves below the main bodice of the shirt. Also I usually glue the skirt base below the main shirt bodice too.
- Glue on the lace and other decorative stuff.
- You're done! Now you can finish by attaching strings to hang your dress or just leave it as it is!!
For this piece, there were a total of 5 different patterned paper, one for the while shirt, the pink suspenders, the skirt, the collar and the strawberries. For the collar, I had to carefully choose from the paper itself because the tessellations of the pattern itself was really funky (does this make sense idk i tried to phrase it as normal as i can). there's thin white lines on the skirt, and then yea some white lace on the shirt. The skirt has scalloped hems!!!

(srry i didn't take photos while i was working on it so no WIP shots, cause i didnt expect it'll turn out so nicely www)
--------------------------------------------------------------------------
I'm not really fond of this, I am quite disappointed actually.... but yea another classmate saw what I made and she wanted one in blue so here it is.....
 |
| White drawing block base, patterned paper |
 |
| Finished dress! The lines on the bib were drawn in black pen and urgh it looks so ugly. |
 |
| FLUFFY SKIIRRRTTTT |
--------------------------------------------------------------------------
This time I tried to do somthing new, which was to add a face to the dress. The dress wasn't very detailed for this ahahaha 8'DDD
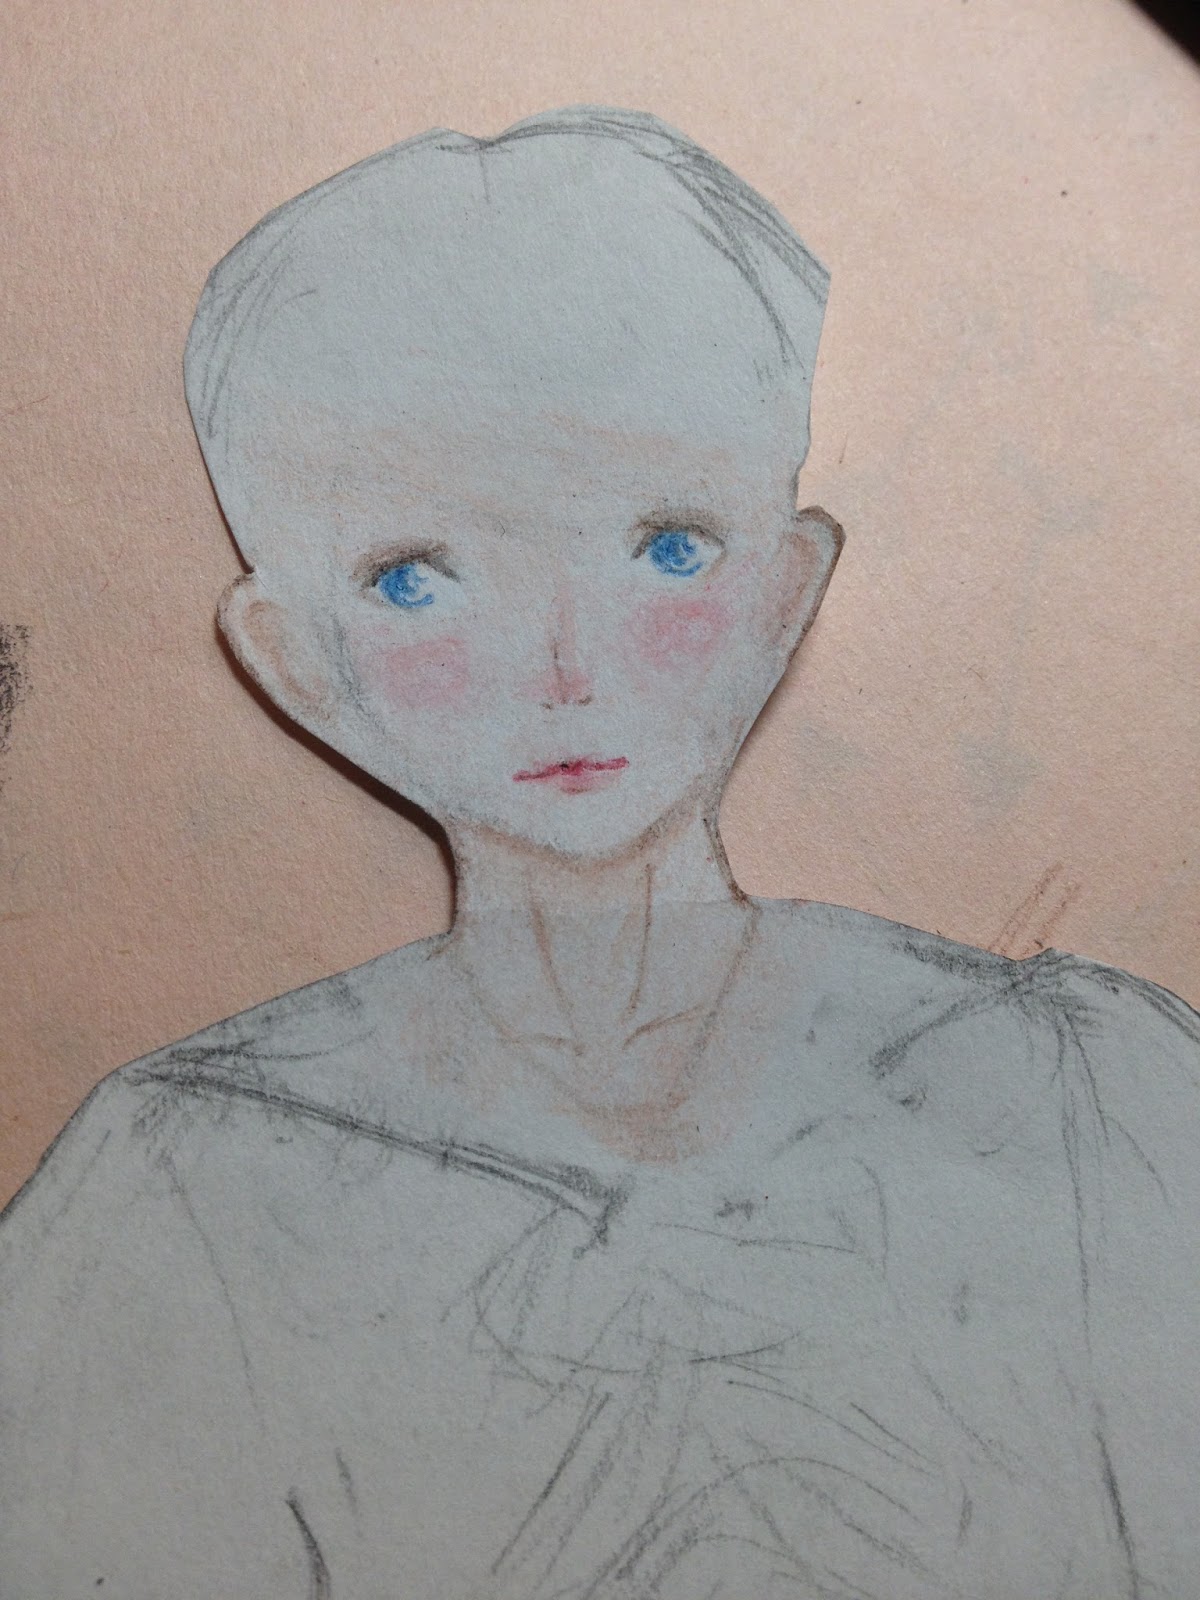 |
| Drawn using watercolour pencils! |
 |
| Cut out silhouette of hair and did some shading with watercolour pencils. |
ok earlier in this post i said smth about choosing patterns right? So yea here's an example of me selectively using patterns to make a bow, i didn't want to just cut a silhouette of a bow from the piece of paper cause it wouldn't be nice. :((((

 |
| Looks a lot better than if I had just cut out a silhouette... |

To get her ears to show up behind the "feelers", I cut the hair up to a point, then slotted the face such that her forehead is behind the fringe and the hair goes in front of the ears. For this the sleeves were glued in front bc i wanted it to look puffy but mmeeeeeehhh i'm not happy with it =/
 |
| It was a card so i pasted the white base to another piece of decorative paper! ------------------------------------------------------------------------- |
Time-wise it takes an average of 5 hrs for each card! Cause you gotta draw, trace then cut the small parts, it can get real tiring! (and i'm not very good with the drawing part so I take a while laughs weakly)
There's more paper cards here! They're all anime/manga character related though but do take a look!:
(Paper Cards Process Log #2)